Hi there, in this week's post, we're highlighting a popular product, sharing another uptime preps, and showing you what our extended warehouse looks like now. We're pumped to share, hope you're pumped to read them too, let's goooo!
Product Highlight: Fuel Pump
The 417059 Fuel Pump FACET DURA-LIFT has been a popular item, and it's recently replenished! This fuel pumps work for at least 6,000 hours (compared to original at 10,000 hours), providing outputs up to 132.5L/hour and .68 bar.
With this fuel pump, debris sometimes gets near the filter area, so for maintenance, clean (or replace) the part periodically. In our range, we have 2 types, 417059 with filter, and 417059 V2 without filter - as diesel engine on your unit already has its own fuel filter.


Uptime Preps: Expansion Tank Checks
In another preparation for the Pre-Uptime Checklist, let's cover the less-obvious parts (obvious: starters, pulleys, belts). Last week, we started with micro-channel condensers cleaning. This week, we focus on Expansion Tank.
The expansion tanks are made of plastic, and during the cold winter time (downtime) it can freeze; and in the heat of the summer, all the sun/UV exposure can degrade the plastic. So, before uptime, inspect your Expansion Tank for any signs of wear-and-tear or deterioration. If it has significant wear-and-tear or damage, you can replace it with a new expansion tank. Furthermore, you can do a preventative measure during uptime by using Expansion Tank Cover.


Do you have ideas on the less-obvious parts and components we should cover next, and include in our Pre-Uptime Checklist? We would love to hear from you👂
See Our Warehouse Upgrade
We want to walk you through our warehouse extension processes that happened last Friday, during the weekend, and early Monday! Check it out 👇
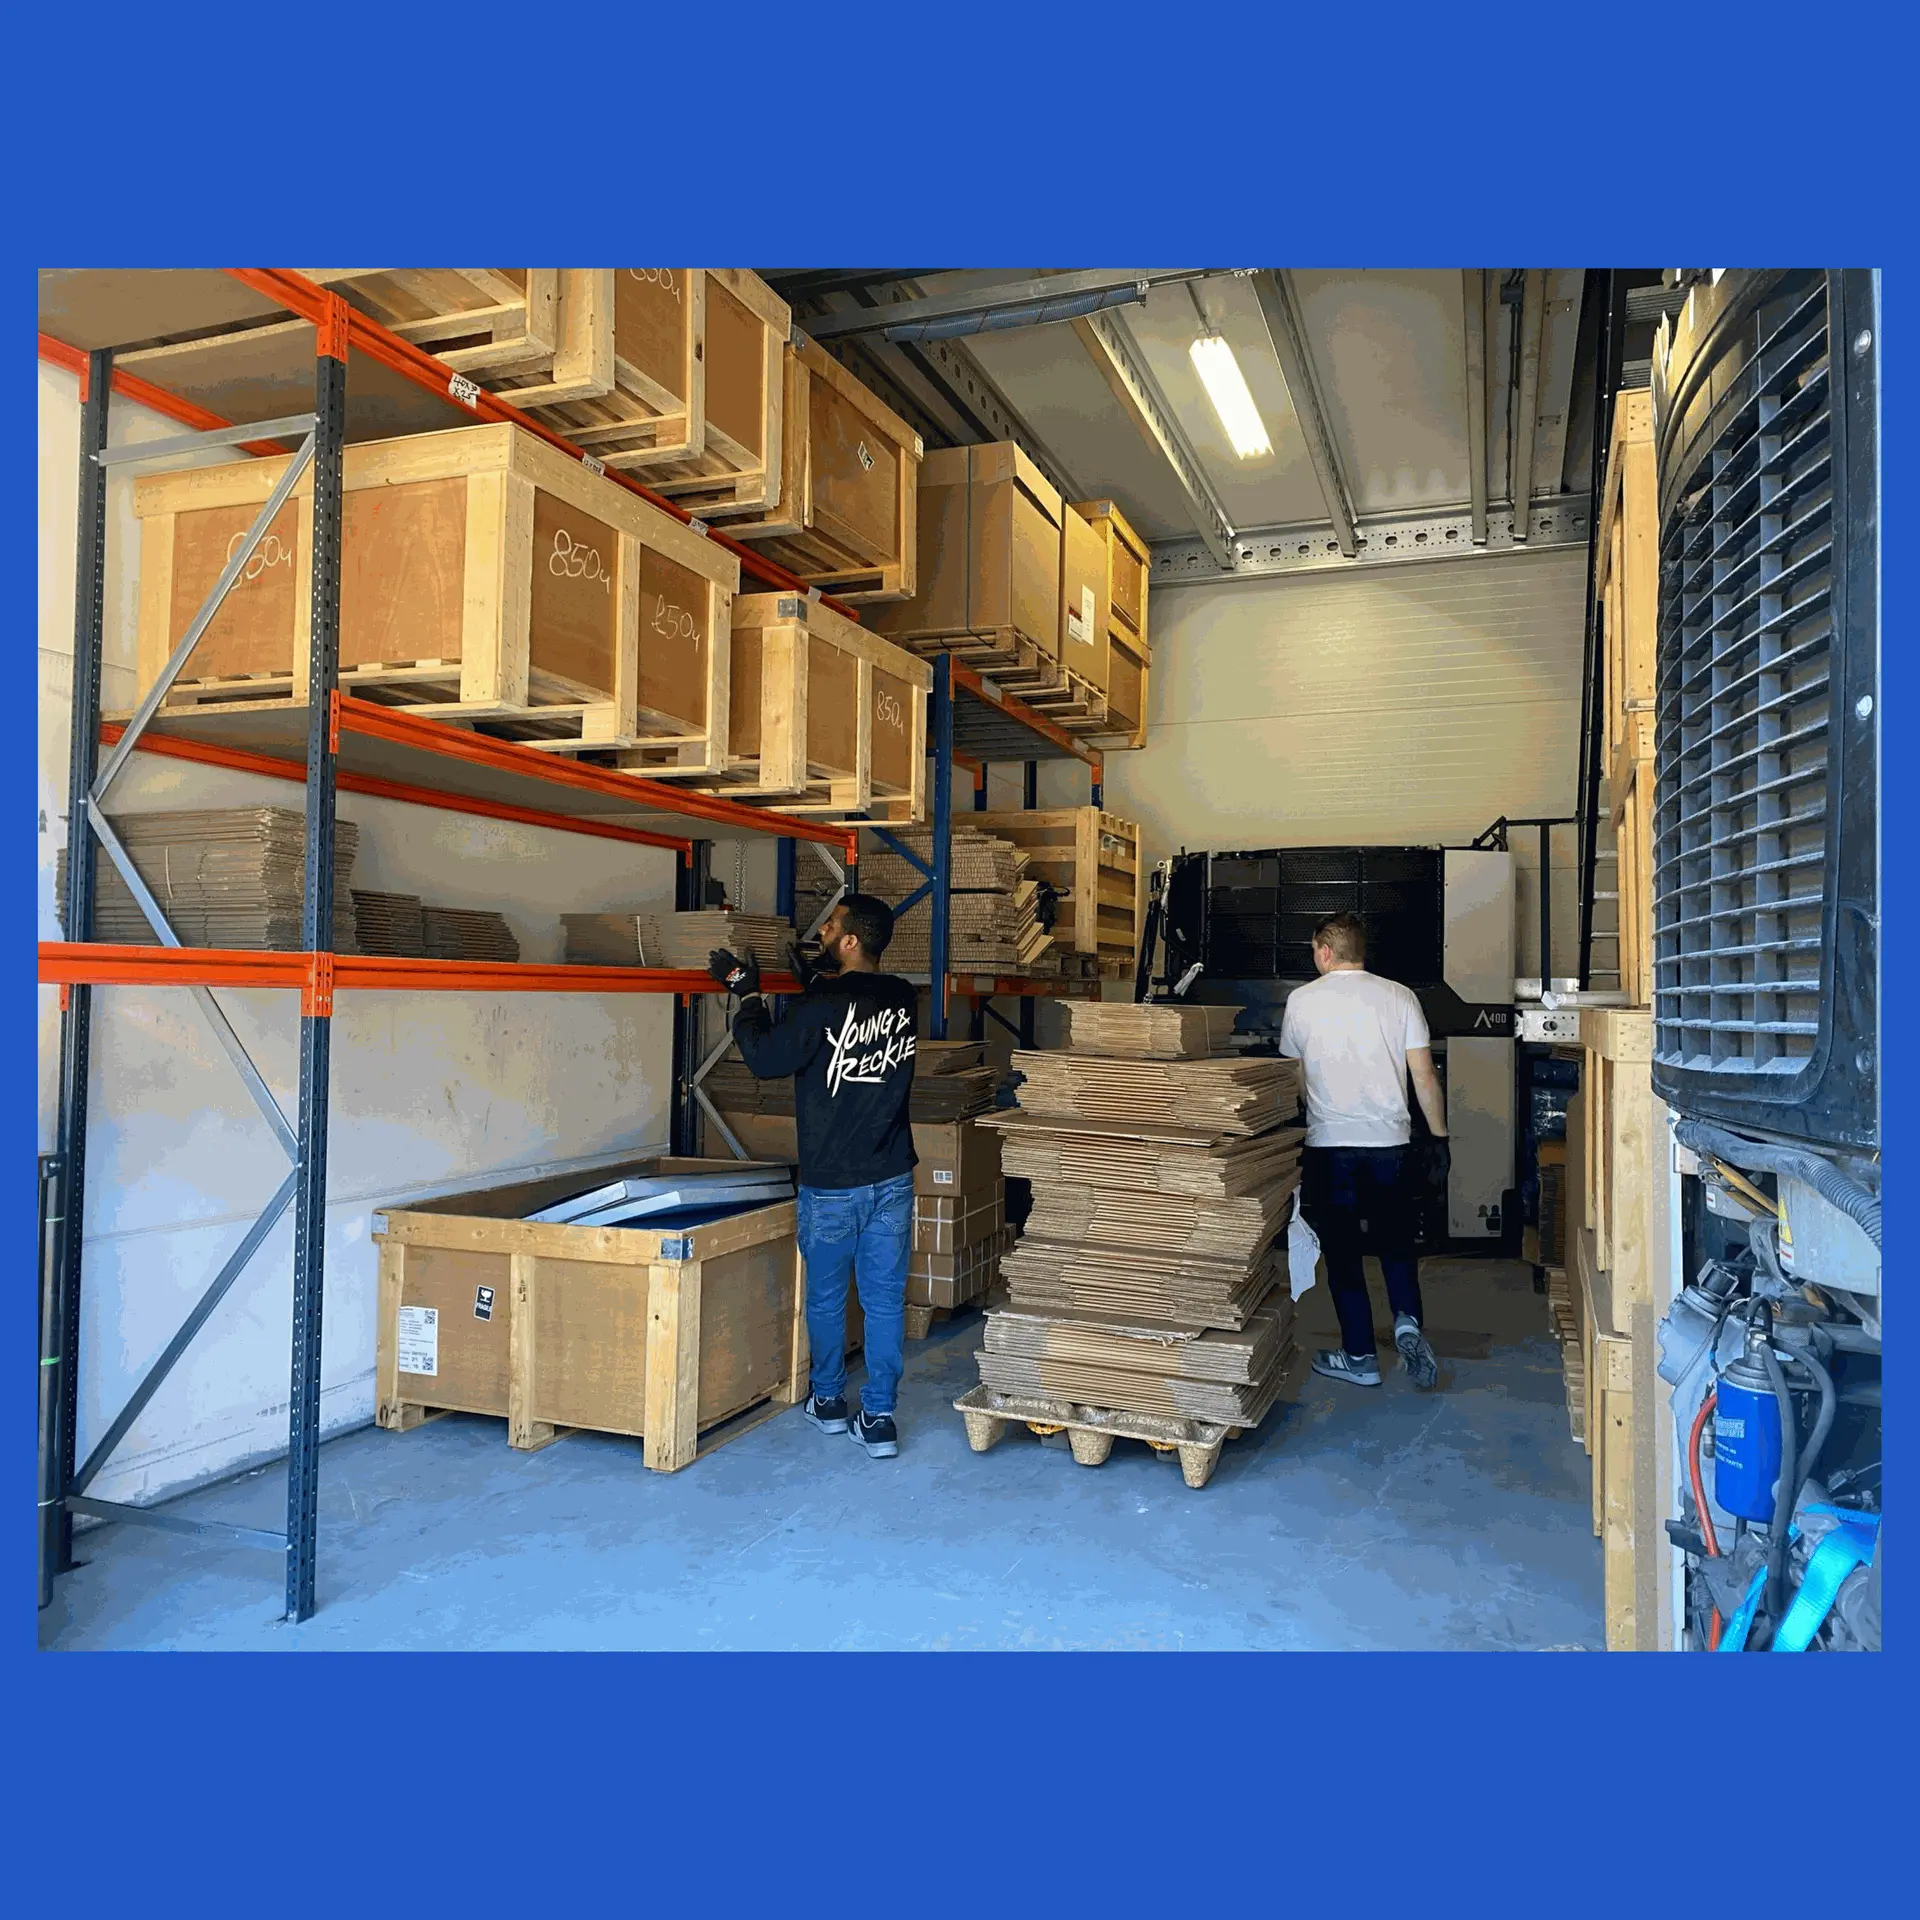
Step 1: Organising Warehouse 2
We needed to clear out some goods and rackings from our Main Warehouse, to make space for the extension.
As we have another warehouse (Warehouse 2), we brought and built the rackings to this warehouse, to organise it in a way that fits storing more products and pallets.
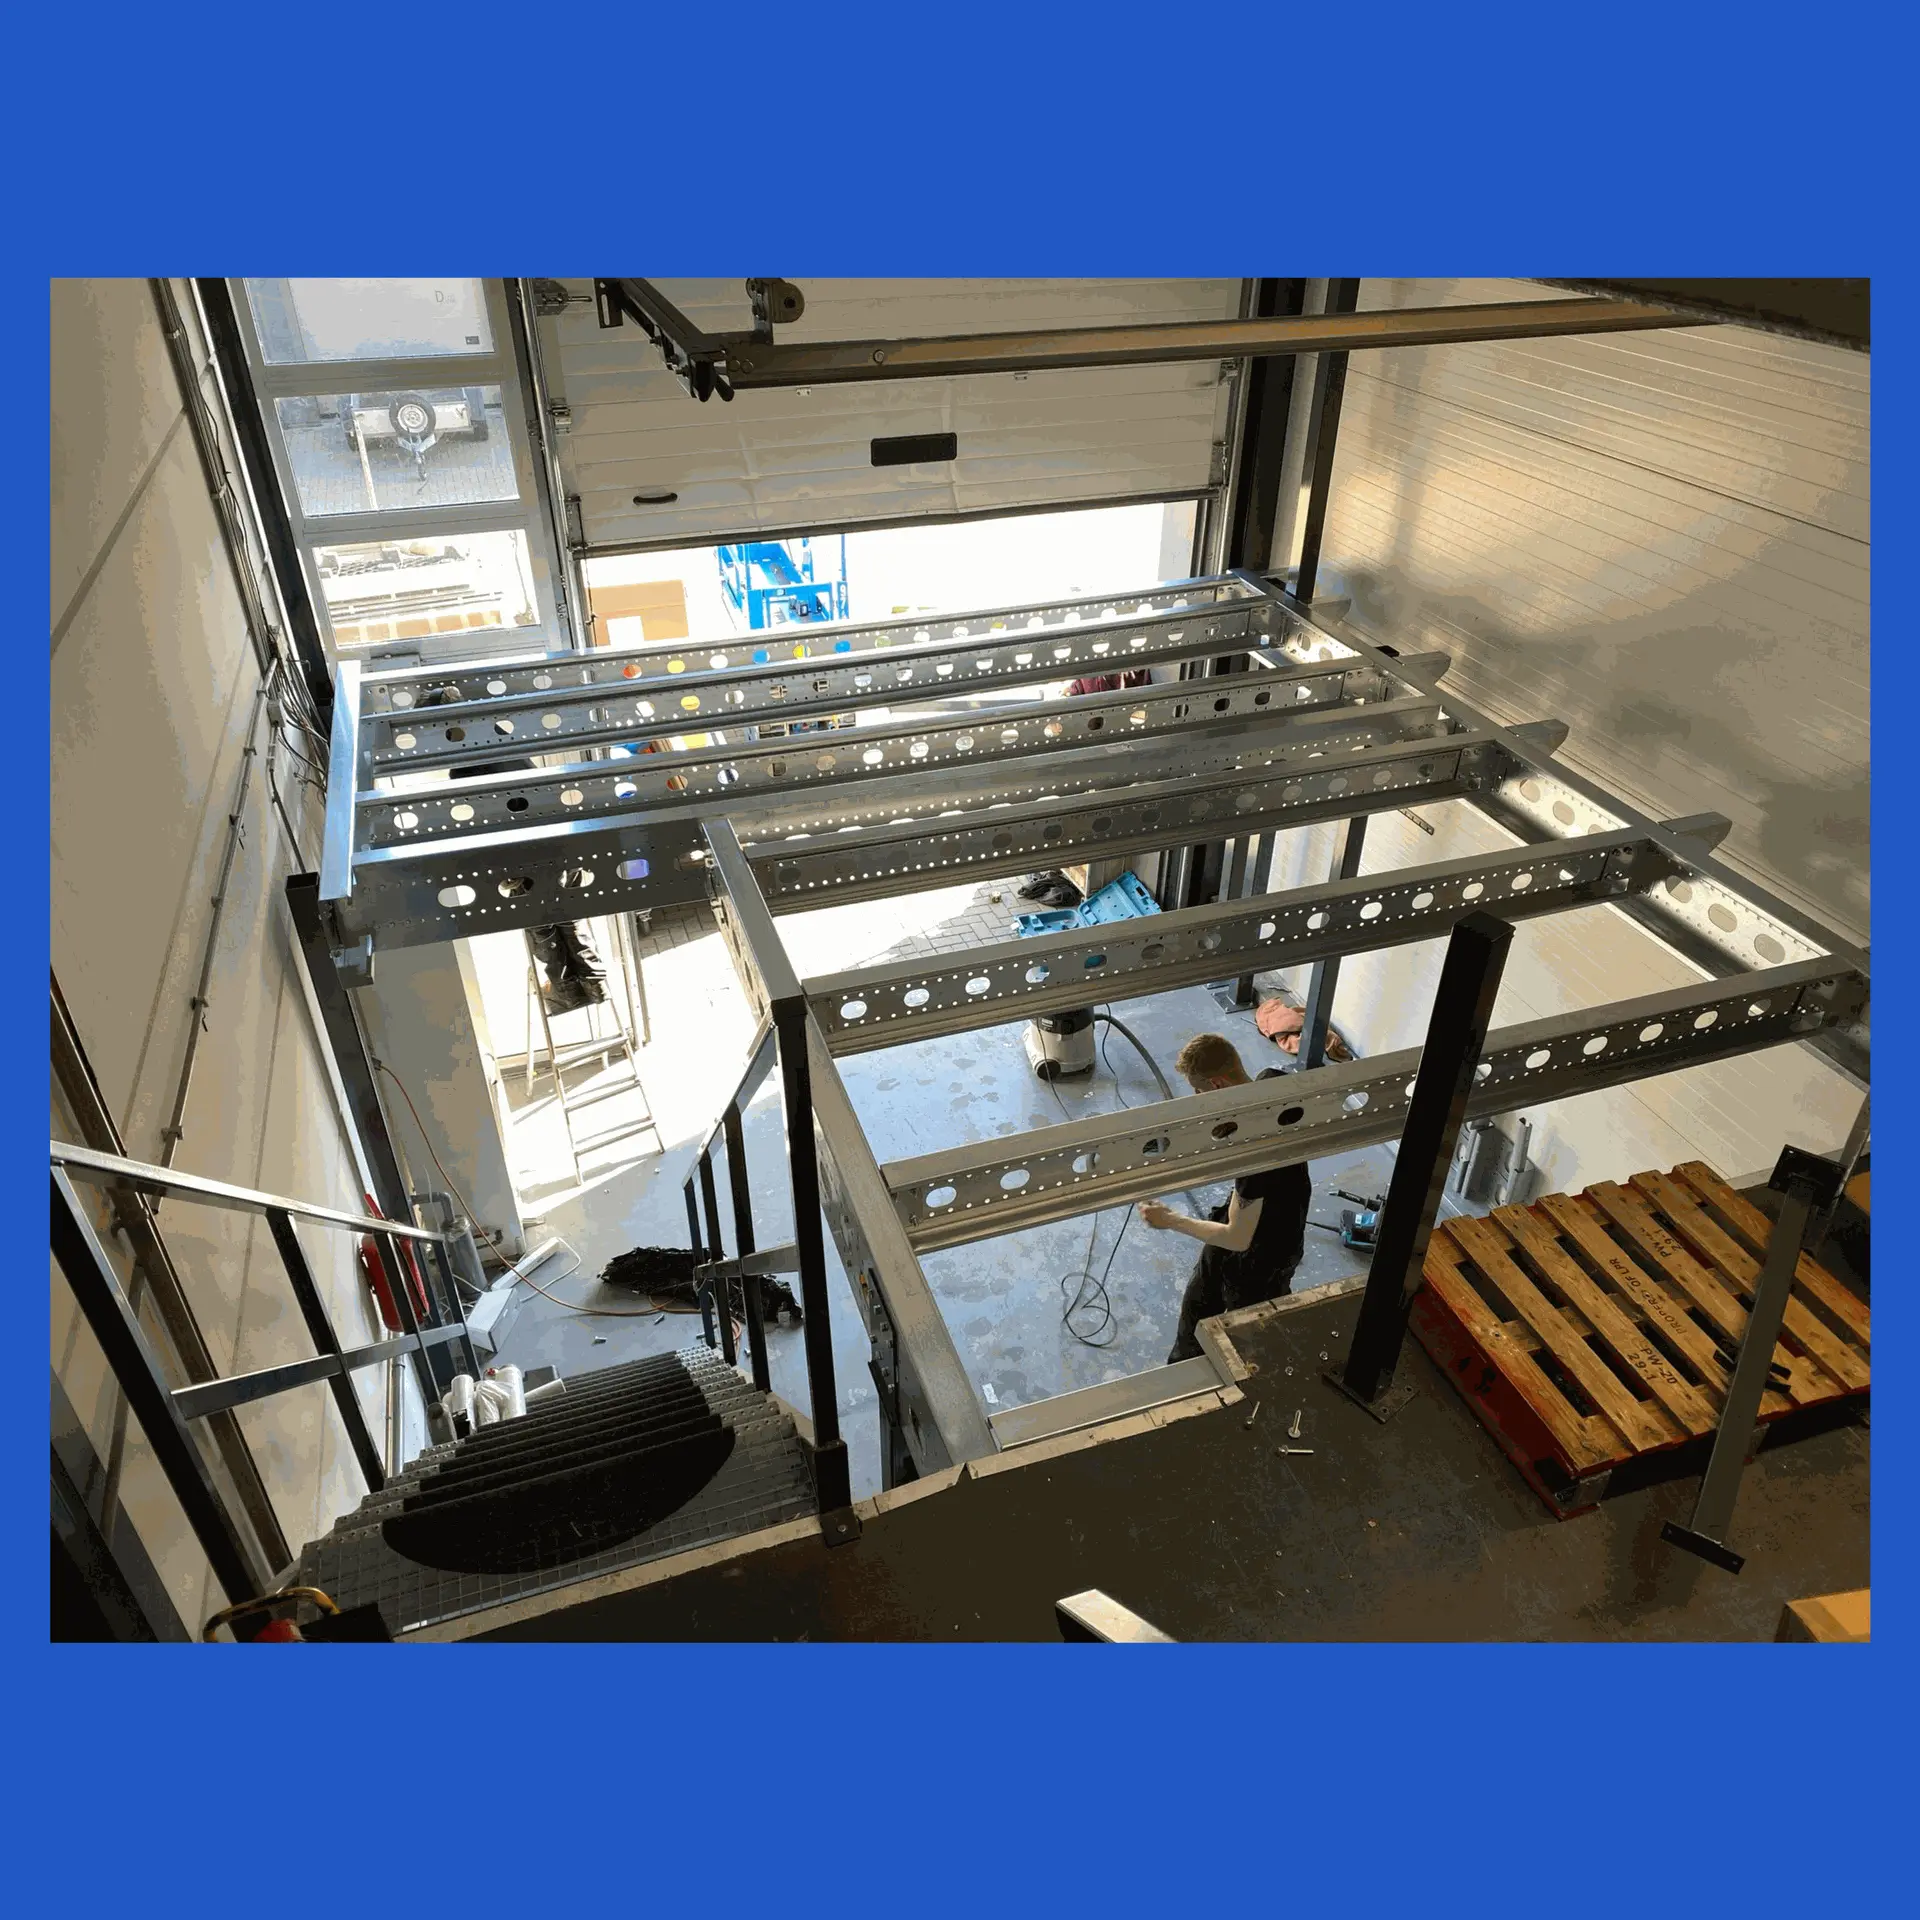
Step 2: Laying the Structures
Builders started around 8:30 AM making structural pillars for the floorspace. Can you believe that they were done with the new extended floorspace by about 3:30 PM?
Our team was amazed by the speed and process. It was just be like building LEGO structure for them!
Step 3: Clean and Reorganise
Once the builders left, our Warehouse team, Roman, Charles and Philippe got to work.
The team swept, vacuumed and cleaned the whole First Floor, and Second Floor from the sawdust and debris.
They also put some office supplies and products in a new place now that the warehouse have a new space and flow.

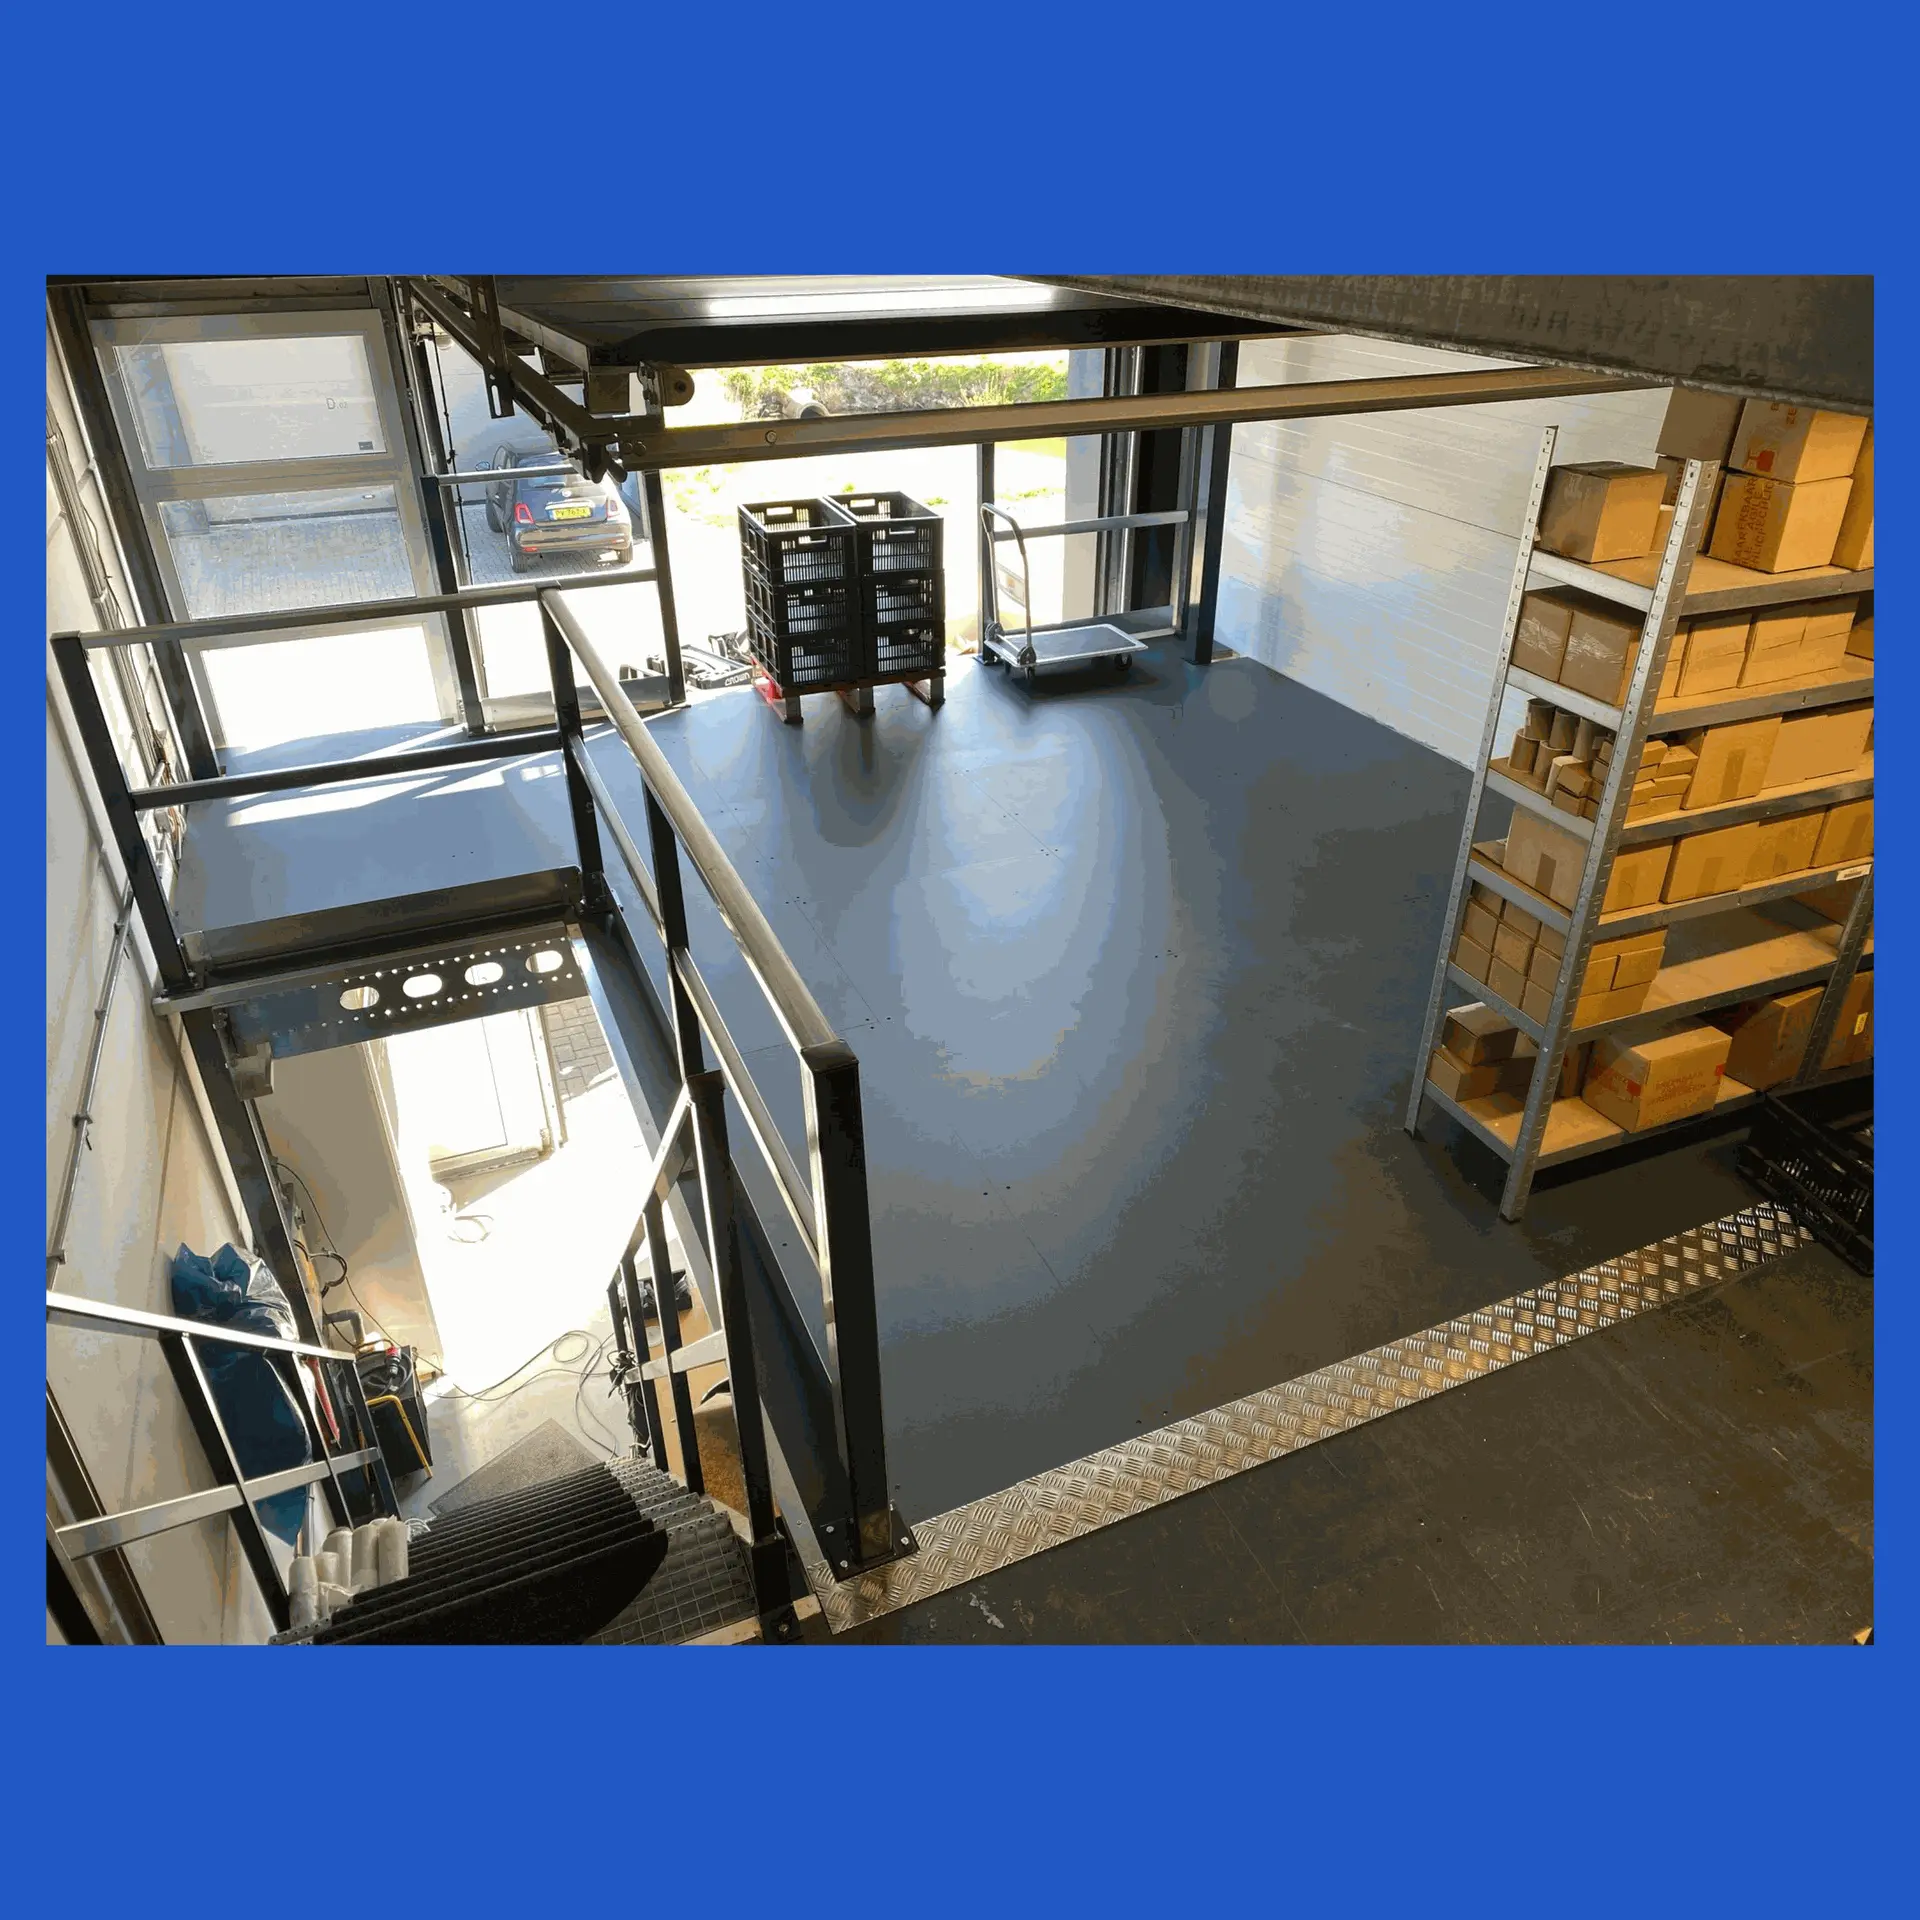
Last Step: Paint the Floor!
Over the weekend, Roman painted the new space in the Second Floor to match the rest of the space. It took him multiple time of painting with priming paint and the colours.
Come Monday time, the whole floor looks fresh and neat, and ready for another organisation process. That's it for now!
Well that's all we can share this time, we hope you had fun checking out the product highlight, uptime preps and our warehouse journey. We'll see you in the next post!
